ADVERTISEMENT
Introduction
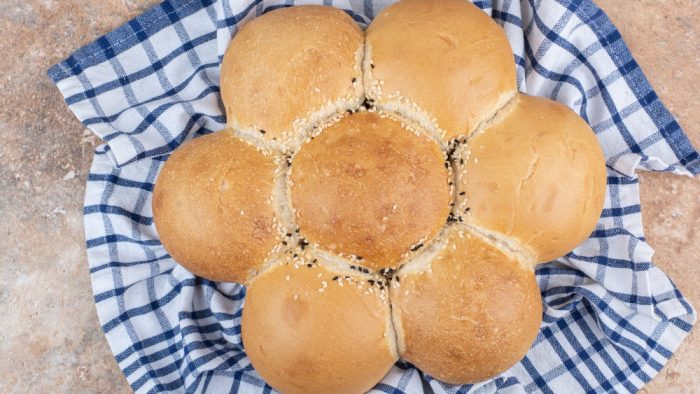
There’s a universal appeal to pulling apart a warm, fluffy bread roll, steam rising and butter melting into its soft, tender crumb. Perfecting the art of creating these delightful dinner rolls is not just a baking activity; it’s an invitation to elevate any dining experience. This comprehensive guide is designed to help you bake the fluffiest, most irresistible bread rolls, rivaling those of professional bakeries and setting a new standard for homemade bread.
Historical Context of Bread Rolls
Bread rolls have a storied history, originating from a wide range of cultures and cuisines. They serve not only as a staple food item but also as a symbol of communal sharing and hospitality. The evolution of bread rolls from simple, unleavened dough to the fluffy, yeast-risen varieties we enjoy today mirrors the advancements in baking techniques and ingredients over centuries. Our recipe pays homage to this rich history, incorporating traditional methods with modern culinary insights.
Ingredients
- 2 1/4 cups warm milk (110°F or 45°C), to activate the yeast
- 1/2 cup granulated sugar, for sweetness and to feed the yeast
- 1/3 cup unsalted butter, melted, plus extra for brushing
- 2 tablespoons active dry yeast, for leavening
- 1 1/2 teaspoons salt, to enhance flavor
- 6 to 6 1/2 cups all-purpose flour, plus more for kneading
- Egg wash (1 egg beaten with 1 tbsp water), for a shiny finish (optional)
How To Make fluffiest bread rolls
- Preparation of Yeast Mixture: Start by combining the warm milk, granulated sugar, and melted butter in a large mixing bowl. Sprinkle the active dry yeast over the mixture and let it sit for 5 to 10 minutes until frothy. This step is crucial for activating the yeast and ensuring your rolls rise beautifully.
- Forming the Dough: Once the yeast mixture is frothy, add salt and begin to gradually incorporate the all-purpose flour, one cup at a time. Stir until a soft dough forms. Depending on humidity and temperature, you may need slightly more or less flour.
- Kneading: Transfer the dough onto a floured surface and knead for about 8 to 10 minutes. The dough should be smooth and elastic. Proper kneading develops the gluten in the flour, contributing to the fluffy texture of the rolls.
- First Rise: Place the kneaded dough in a greased bowl, turning it once to grease the top. Cover with a clean kitchen towel and let it rise in a warm, draft-free place for about 1 hour, or until it has doubled in size. This first rise is essential for developing the dough’s structure and flavor.
- Shaping the Rolls: Punch down the risen dough to release any air bubbles. Divide the dough into 24 equal pieces, shaping each piece into a smooth ball. Arrange the shaped rolls in a greased 9×13 inch baking pan, allowing some space for them to expand.
- Second Rise: Cover the shaped rolls with a towel and let them rise again in a warm place for 30 minutes, or until they have doubled in size. This second rise ensures the rolls are light and airy.
- Baking: Preheat your oven to 350°F (175°C). If using, brush the tops of the rolls with egg wash for a glossy finish. Bake the rolls for 20-25 minutes, or until they are golden brown and sound hollow when tapped on the bottom.
- Serving: Remove the rolls from the oven and, if desired, brush the tops with additional melted butter for a soft, flavorful crust. Serve warm for the best experience.
Conclusion
Baking the perfect fluffy bread rolls is an art that combines precision, patience, and a touch of love. By following this detailed guide, you’re not just baking; you’re creating memories and traditions that can be passed down through generations. Whether served alongside a family dinner or enjoyed as a comforting snack, these bread rolls are sure to impress and delight anyone who tastes them.
Remember, baking is both a science and an art. Each step in this recipe is designed to ensure success, but don’t be afraid to add your personal touch. Experiment with different flours, add herbs or spices, or adjust the sugar content to suit your taste. The possibilities are endless.
ADVERTISEMENT


